Thanks so much for stopping by, and I hope you'll come back and visit again soon!
A place for me to share the cards I create, and maybe a few other things, too!
Showing posts with label QuicKutz. Show all posts
Monday, June 2, 2025
Congrats, JP!
The son of some of our friends graduated from high school this year, and here is the card that I made for him. I'm quite sure I must have made a card like this before, but this is unique with his colors and initials. :-) I used my JustRite Stamper for the stamped part. Dies for the circles. QuicKutz dies for the hat and diploma. Cuttlebug folder for the embossed background. That's about it.
Labels:
Cuttlebug Folder,
Graduation,
JustRite Stamper,
QuicKutz
Wednesday, July 20, 2022
Daisy Thinking of You
I really love daisy cards, and especially those done in yellow, white and black! I pulled out this die to share with a friend, so I quick used it first. The die cuts the flowers, but leaves them in the cardstock. I added yellow enamel dots for the centers. The centers were cut out with the die and I had wanted the yellow polka dotted paper to show through, but I decided that I wanted a little more. I added thin black cardstock strips beside the daisy panel. The patterned paper is from Die Cuts With a View, the daisy die is from QuicKutz/Lifestyle Crafts and the sentiment is from Maya Road.
Thanks so much for stopping by, and I hope you'll come back and visit again soon!
Labels:
DIe Cuts With a View,
Dies,
Lifestyle Crafts,
Maya Road,
QuicKutz,
Thinking of You
Wednesday, January 13, 2021
Patterned Paper Ornaments
While looking for a die, I came across this one from QuicKutz/Lifestyle Crafts. It cuts both ornaments and toppers for each of them. I cut them each from patterned paper and also from white. I attached the layers together for stability. I cut the toppers out of gold foil cardstock. I popped them up on foam squares and added gold strings. All the patterned paper is from The Paper Studio. I thought about adding a sentiment, but I thought there was enough words already!
Thanks so much for stopping by, and I hope you'll come back and visit again soon!
Wednesday, September 18, 2019
Another Christmas Stencil
I'm catching up on blog posts. But, this is my last card for a while. I had a good streak, but haven't really spent much time in my stamping for for a couple weeks. At any rate, here is my card for today. I used another stencil from Plaid for this one. To the trees, I added the strings and used Nuvo drops for the ornaments. I also added some white dots to the red spots with a gel pen. I also added some scored lines with my ScorPal. The sentiment is from Papertrey Ink.
Edited to add: Unimportant, but I think the drops on the tree were made with platinum Liquid Pearls, not Nuvo drops. 😀
Thanks so much for stopping by, and I hope you'll come back and visit again soon!
Edited to add: Unimportant, but I think the drops on the tree were made with platinum Liquid Pearls, not Nuvo drops. 😀
Thanks so much for stopping by, and I hope you'll come back and visit again soon!
Sunday, March 3, 2019
Pink Daisies for Nancy
Today is the birthday of a woman in our stamping group. She lives in Florida and we've never had the pleasure of meeting her in person. Here is the card I sent to her.
I cut the four smaller diamond-shaped pieces out of white, then temporarily taped them together. I stamped the images (two separate stamps) and colored them with Copic markers. I added some "specks" with an ancient Stampin' Up! stamp. I cut a large diamond out of black, separated the four smaller diamonds, and added them to the large diamond. The sentiment is from a different unbranded set.The diamonds were cut with QuicKutz dies.
Thanks so much for stopping by, and I hope you'll come back and visit again soon!
I cut the four smaller diamond-shaped pieces out of white, then temporarily taped them together. I stamped the images (two separate stamps) and colored them with Copic markers. I added some "specks" with an ancient Stampin' Up! stamp. I cut a large diamond out of black, separated the four smaller diamonds, and added them to the large diamond. The sentiment is from a different unbranded set.The diamonds were cut with QuicKutz dies.
Thanks so much for stopping by, and I hope you'll come back and visit again soon!
Thursday, November 1, 2018
November Calendar Page
Here is my November calendar page. I used QuicKutz dies for the pumpkin. The leafy stamp and the sentiment are from Inkadinkado. I also sponged some brownish ink around the pieces of the pumpkin before assembling it.
Thanks so much for stopping by, and I hope you'll come back and visit again soon!
Saturday, November 11, 2017
Ornaments on a Branch

This pine branch was my latest die purchase. I cut it out of green. (Two branches came with it. I'll use the smaller ones later.) I embossed the background with a retired Sizzix embossing folder and matted with matching green cardstock. I used an old QuicKutz die to cut the ornaments out of patterned paper. I then cut them out of cardstock to glue the paper onto for added strength. I also cut the ornament hangers out of silver and added them to the tops of the ornaments. I mounted the ornaments on foam squares. I used pieces of silver cord to "hang" the ornaments from the branches. The sentiment is from Hero Arts.
Several people asked me about the die I used on Thursday's card. I got it here.
Thanks so much for stopping by, and I hope you'll come back and visit again soon!
Labels:
Christmas,
Dies,
Hero Arts,
QuicKutz,
Sizzix embossing folder
Wednesday, February 1, 2017
February Calendar Page
Wow, another month has flown by! Here is my February calendar page. I used dies from Quickutz (LifeStyle Crafts) to cut the center hearts, and a Fiskars punch to punch the smaller hearts. The background was embossed with a Darice embossing folder.
If you would like to print and make your own calendars using my blank calendar file, you can find the Excel file and the cutting instructions in the Calendar tab under my blog title. I'd love to hear from you if you do! If you have problems with the files, please let me know and I can email them to you.
Thanks so much for stopping by, and I hope you'll come back and visit again soon!
If you would like to print and make your own calendars using my blank calendar file, you can find the Excel file and the cutting instructions in the Calendar tab under my blog title. I'd love to hear from you if you do! If you have problems with the files, please let me know and I can email them to you.
Thanks so much for stopping by, and I hope you'll come back and visit again soon!
Sunday, November 22, 2015
Winter Birthday
This is the card I made for our daughter-in-law. Her birthday is in December.
I started with a piece of watercolor cardstock and painted the blue on it. I cut out the "birthday" with a Papertrey Ink die. I adhered acetate behind that area and added the letter centers back in. I cut the snowflakes with a Quickutz die and the "happy" with a My Favorite Things die - all out of silver foil cardstock. I added white dashed lines around the edge, glued the die-cut pieces on, and mounted the entire panel on foam tape.
Thanks so much for stopping by, and I hope you'll come back and visit again soon!
I started with a piece of watercolor cardstock and painted the blue on it. I cut out the "birthday" with a Papertrey Ink die. I adhered acetate behind that area and added the letter centers back in. I cut the snowflakes with a Quickutz die and the "happy" with a My Favorite Things die - all out of silver foil cardstock. I added white dashed lines around the edge, glued the die-cut pieces on, and mounted the entire panel on foam tape.
Thanks so much for stopping by, and I hope you'll come back and visit again soon!
Labels:
Birthday,
My Favorite Things,
Papertrey,
QuicKutz,
Watercolor
Monday, April 6, 2015
Love Ya Bunches #1
Next in my series of using my retired Stampin' Up! sets.
The image is from the SU set called "Love Ya Bunches." I stamped with Memento ink and colored with Copics. I hand-doodled around the edge. The matting was cut with a Spellbinders die. I mounted the panel on foam squares. I embossed the background with a Quickutz folder and matted with black.
Thanks so much for stopping by, and I hope you'll come back and visit again soon!
The image is from the SU set called "Love Ya Bunches." I stamped with Memento ink and colored with Copics. I hand-doodled around the edge. The matting was cut with a Spellbinders die. I mounted the panel on foam squares. I embossed the background with a Quickutz folder and matted with black.
Thanks so much for stopping by, and I hope you'll come back and visit again soon!
Wednesday, February 18, 2015
Gently Falling
The Stampin' Up! set I used for today's cards is called "Gently Falling." I really do like these stamps, but I'm not sure if I had ever used them. The cards are all identical except for the color and the stamps. I embossed the background with a Quickutz embossing folder and mounted the image panels on foam squares.
Thanks so much for stopping by, and I hope you'll come back and visit again soon!
Wednesday, August 28, 2013
Flutter By Wednesday - Shaped Card
This week's Flutter By Wednesday challenge is to make a shaped card - no squares or rectangles allowed! :) Be sure to include your butterfly or fairy, then link it up to the FBW blog.
I decided to go with a heart card. We have a wedding to go to on Saturday, so this is for the new bride and groom. I used QuickKutz dies for the hearts and doves. The doves are cut from shimmery silver. The butterflies were punched with a Martha Stewart punch from the same silver. I used dark gray gems for the eyes of the doves and the butterflies. The stamps are from an Inkadinkado set and are embossed with silver. The stripes in the black paper are silver, also. Oh, and I put a little Versamark along the edges of the white heart and added silver embossing powder to that, too.
Edited to add: I'm linking this card up to the Designer's Choice Challenge at Repeat Impressions. The challenge this week: No Square Cards! :)
Thanks so much for stopping by, and I hope you'll come back and visit again soon!
I decided to go with a heart card. We have a wedding to go to on Saturday, so this is for the new bride and groom. I used QuickKutz dies for the hearts and doves. The doves are cut from shimmery silver. The butterflies were punched with a Martha Stewart punch from the same silver. I used dark gray gems for the eyes of the doves and the butterflies. The stamps are from an Inkadinkado set and are embossed with silver. The stripes in the black paper are silver, also. Oh, and I put a little Versamark along the edges of the white heart and added silver embossing powder to that, too.
Edited to add: I'm linking this card up to the Designer's Choice Challenge at Repeat Impressions. The challenge this week: No Square Cards! :)
Thanks so much for stopping by, and I hope you'll come back and visit again soon!
Labels:
Flutter By Wednesday,
Inkadinkado,
Martha Stewart,
QuicKutz,
Wedding
Sunday, August 4, 2013
Christmas Sunday
Two more Christmas cards. I think I'm about half done - 37 finished.
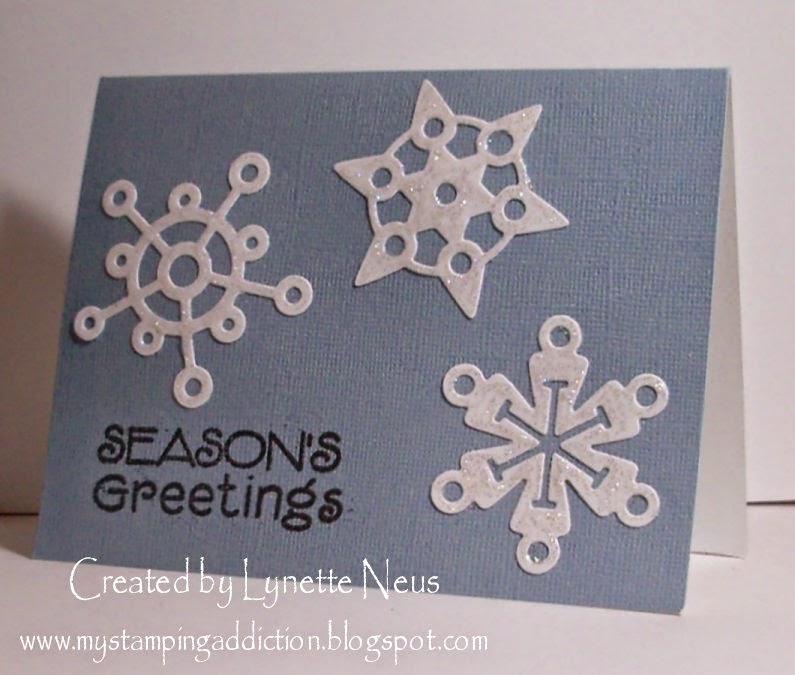
Both of today's cards have snowflakes from my "Card Parts" box. They were cut using a Quickutz die. I added Star Dust Stickles. This first one has patterned paper from a Recollections stack and the sentiment (from Hero Arts) is stamped in black.
This second one is made using a textured blue card base. The sentiment is embossed with pewter embossing powder.
I'm linking these up to the Christmas Card Challenge blog.
Thanks so much for stopping by, and I hope you'll come back and visit again soon!
Both of today's cards have snowflakes from my "Card Parts" box. They were cut using a Quickutz die. I added Star Dust Stickles. This first one has patterned paper from a Recollections stack and the sentiment (from Hero Arts) is stamped in black.
This second one is made using a textured blue card base. The sentiment is embossed with pewter embossing powder.
I'm linking these up to the Christmas Card Challenge blog.
Thanks so much for stopping by, and I hope you'll come back and visit again soon!
Friday, February 1, 2013
February Calendar Page
I'm kind of surprised I remembered to post my calendar page, with everything that's going on, but here it is!
I used a Quickutz die for the heart - the pink is textured paper. The sentiment is a from a dollar Studio G set.
My mom went home from the hospital yesterday. She has an appointment next week and will find out what's in store for her - if she will have to have radiation or not. Thanks again, so much, for your prayers for her.
We scheduled movers for Tuesday! We decided we needed someone to move our heavy furniture. We will have moved most everything else over there by then. Sure will be nice to only have one house to take care of again! And it will be awesome to be all settled.
Thanks so much for stopping by, and I hope you'll come back and visit again soon!
I used a Quickutz die for the heart - the pink is textured paper. The sentiment is a from a dollar Studio G set.
My mom went home from the hospital yesterday. She has an appointment next week and will find out what's in store for her - if she will have to have radiation or not. Thanks again, so much, for your prayers for her.
We scheduled movers for Tuesday! We decided we needed someone to move our heavy furniture. We will have moved most everything else over there by then. Sure will be nice to only have one house to take care of again! And it will be awesome to be all settled.
Thanks so much for stopping by, and I hope you'll come back and visit again soon!
Wednesday, November 14, 2012
Flutter By Wednesday #214 - Thanks!
Today is the start of a new challenge from the Flutter By Wednesday challenge blog. The challenge for this week is to make a card with the theme "Thankful/Giving Thanks." Thanks for joining us last week, and we hope to have you join again this week!
I was playing around with my Letterpress a few weeks ago, and had this piece still laying on my table. The dashed wavy lines and the "thanks" were inked and pressed with the Letterpress on Letterpress paper. I cut it down to just less than the size of a card front and sponged some purple ink around the edges. The butterflies (gray and patterned purple) were punched with a Martha Stewart punch. I added clear gems to the butterfly bodies.
Thanks so much for stopping by, and I hope you'll come back and visit again soon!
I was playing around with my Letterpress a few weeks ago, and had this piece still laying on my table. The dashed wavy lines and the "thanks" were inked and pressed with the Letterpress on Letterpress paper. I cut it down to just less than the size of a card front and sponged some purple ink around the edges. The butterflies (gray and patterned purple) were punched with a Martha Stewart punch. I added clear gems to the butterfly bodies.
Thanks so much for stopping by, and I hope you'll come back and visit again soon!
Labels:
Flutter By Wednesday,
Letterpress,
Martha Stewart,
QuicKutz
Wednesday, October 24, 2012
Flutter By Wednesday #211 - A Sketch
Today's Flutter By Wednesday challenge is another sketch by Kathy. Take a look:) What a great sketch - thanks, Kathy! Also, thanks to everyone who joined us last week. I hope we'll have even more participants this week! Please visit the blog for details.
The sketch reminded me of an embossing folder that I have, so I started there. It's from Quickutz. I embossed white cardstock and matted with Pale Plum from Stampin' Up. I added the sheer ribbon before adhering the matting. The butterfly, from Hampton Art, was first stamped on Pale Plum with Perfect Plum ink and cut out. I colored the body with a black marker. Then I stamped the image again with black on white cardstock, added the sentiment, from The Paper Company, and cut them out with a Circle Nestability. I glued the plum butterfly over the black-stamped one, leaving the wings free. The scalloped matting was also cut using a Nestability, again from Pale Plum. I mounted the circle on foam squares. I really wanted to add Stickles to the butterfly, but I was worried it would make the ink bleed.
Thanks so much for stopping by, and I hope you'll come back and visit again soon!
The sketch reminded me of an embossing folder that I have, so I started there. It's from Quickutz. I embossed white cardstock and matted with Pale Plum from Stampin' Up. I added the sheer ribbon before adhering the matting. The butterfly, from Hampton Art, was first stamped on Pale Plum with Perfect Plum ink and cut out. I colored the body with a black marker. Then I stamped the image again with black on white cardstock, added the sentiment, from The Paper Company, and cut them out with a Circle Nestability. I glued the plum butterfly over the black-stamped one, leaving the wings free. The scalloped matting was also cut using a Nestability, again from Pale Plum. I mounted the circle on foam squares. I really wanted to add Stickles to the butterfly, but I was worried it would make the ink bleed.
Thanks so much for stopping by, and I hope you'll come back and visit again soon!
Friday, October 12, 2012
SCS Free 4 All Challenge
This card is for today's SplitCoastStampers Free 4 All challenge - to use the negative image from a die or punch.
The balloon dies I used are from Quickutz/Lifestyle Crafts. The sentiment is from The Paper Company. After cutting out the balloons and stamping the sentiment, I embossed with a Cuttlebug Swiss Dots folder, added the patterned paper, and matted with black. I decided to add two of the balloons that I cut out, too, so I sponged some Rose Romance ink around the edges and mounted them on foam squares. The patterned paper is from My Mind's Eye.
Thanks so much for stopping by, and I hope you'll come back and visit again soon!
The balloon dies I used are from Quickutz/Lifestyle Crafts. The sentiment is from The Paper Company. After cutting out the balloons and stamping the sentiment, I embossed with a Cuttlebug Swiss Dots folder, added the patterned paper, and matted with black. I decided to add two of the balloons that I cut out, too, so I sponged some Rose Romance ink around the edges and mounted them on foam squares. The patterned paper is from My Mind's Eye.
Thanks so much for stopping by, and I hope you'll come back and visit again soon!
Monday, July 2, 2012
Repeat Impressions Stamp of the Week - Here's To You
This week's Stamp of the Week from Repeat Impressions is "Here's to You." You can find it on this page. (Wendy has lots more patriotic stamps on that page, too.) For this week only (through Sunday evening) it's available at 50% off. You can find all the details on the Repeat Impressions blog, The House That Stamps Built. You will also find the Rock Stars' creations there. Or, you can follow these links to their blogs:
I stamped the sentiment on white cardstock and then cut it out with a Spellbinders die. I mounted on foam squares. The star was cut with a Quickutz die. It has a thin border of solid blue. The papers are all from the very first matstack I bought (from Die Cuts With a View) about ten years ago!
There are two current challenges from Repeat Impressions that are open to new entries. One is the Designer's Choice Challenge (Head for the Beach, found here) for a chance to win a full sheet of unmounted rubber of your choice, and the WHAT IF? Wednesday sketch challenge (found here) for a chance to win a $25 gift certificate to Repeat Impressions. What are you waiting for? :)
Thanks so much for stopping by, and I hope you'll come back and visit again soon!
Tuesday, June 12, 2012
One Image - Two Different Cards
I used the same image stamp for these two cards. In fact, I only inked it up once. It's from a set by 2RedBananas (no longer in business.) I inked it with Stampin' Up!'s Soft Suede ink. Then I colored the leaves with an Always Artichoke marker and the flowers with a black marker. The first card shown here is the second stamping. I added the sentiment (from Papertrey Ink) in Soft Suede and matted with pink and mounted on Pop Dots. The Creamy Caramel piece was embossed with a Quickutz folder. I also added small gems to each flower.
This was the first stamping. I colored the flowers with a Melon Mambo marker. The sentiment is from a Stampin' Up! set. I stamped it with Soft Suede. I matted with Soft Suede and mounted on Pop Dots. The strip across the background is Soft Suede, also.
Thanks so much for stopping by, and I hope you'll come back and visit again soon!
This was the first stamping. I colored the flowers with a Melon Mambo marker. The sentiment is from a Stampin' Up! set. I stamped it with Soft Suede. I matted with Soft Suede and mounted on Pop Dots. The strip across the background is Soft Suede, also.
Thanks so much for stopping by, and I hope you'll come back and visit again soon!
Thursday, March 15, 2012
Featured Stamper Card #2 - For Harriet
This is the second card I made for the SplitCoastStampers Featured Stamper for this week. The Featured Stamper is my great friend, Harriet. I chose to case this card.
I changed the colors, added a matting layer, and mounted the cutout heart layer on Dimensionals. The heart was cut with a Quickutz die. The paper is from Die Cuts With a View. The sentiment is from a dollar set from Michaels.
Thanks so much for stopping by, and I hope you'll come back and visit again soon!
I changed the colors, added a matting layer, and mounted the cutout heart layer on Dimensionals. The heart was cut with a Quickutz die. The paper is from Die Cuts With a View. The sentiment is from a dollar set from Michaels.
Thanks so much for stopping by, and I hope you'll come back and visit again soon!
Subscribe to:
Posts (Atom)