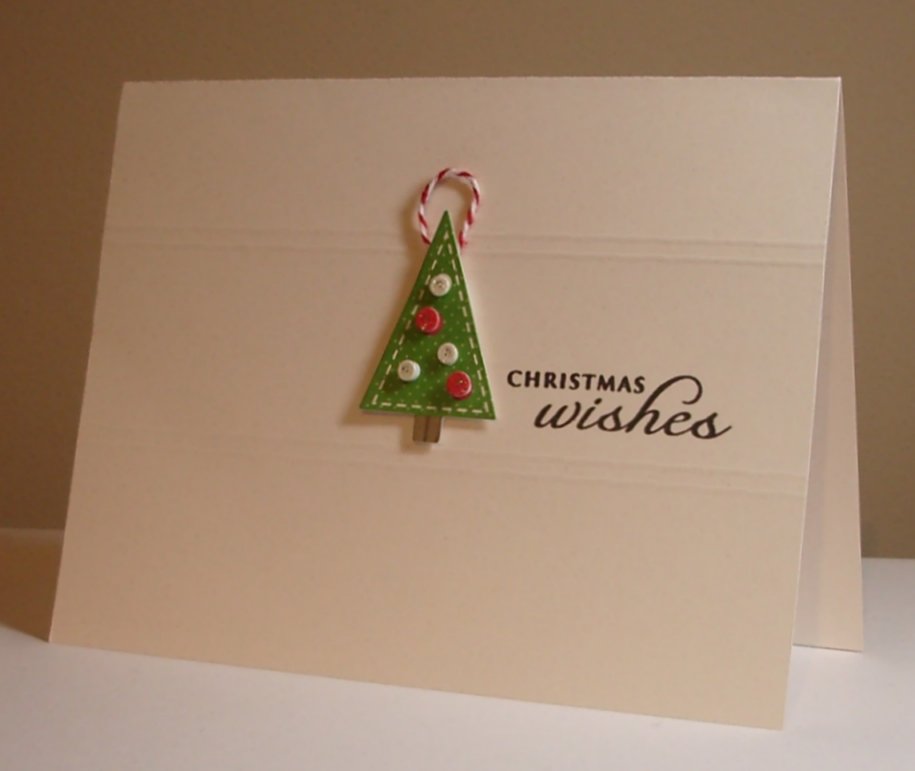
I don't remember what site I got this image from, but it's a digital one. I still can't find my "ingredients" sheet for my calendar pages. At least I had it for most of the year:) I colored the cute turkey with Copics. The sentiment was computer-generated and printed at the same time as the image. I matted with a shimmery coppery paper.
Thanks so much for stopping by, and I hope you'll come back and visit again soon!
A place for me to share the cards I create, and maybe a few other things, too!
Thursday, November 1, 2012
Wednesday, October 31, 2012
Flutter By Wednesday #212
Time for a new challenge from the Flutter By Wednesday blog. You'll love it - this week's challenge is open. Just be sure to include your butterfly or fairy! You can find the details on the FBW blog, here.
I forgot that I was going to use a Halloween image - oops! Happy Halloween, everyone! I chose to use another Tiddlyinks digital image that I've had for a few years. I paper-pieced the flower and flower center and colored the rest with Copic markers. Of course I had to add Star Dust Stickles to her wings :) I matted with black - both layers. The bottom layer and the paper piecing are paper from a Recollections pad. The sentiment is from a Papertrey Ink set. We'd love to have you join us!
Thanks so much for stopping by, and I hope you'll come back and visit again soon!
I forgot that I was going to use a Halloween image - oops! Happy Halloween, everyone! I chose to use another Tiddlyinks digital image that I've had for a few years. I paper-pieced the flower and flower center and colored the rest with Copic markers. Of course I had to add Star Dust Stickles to her wings :) I matted with black - both layers. The bottom layer and the paper piecing are paper from a Recollections pad. The sentiment is from a Papertrey Ink set. We'd love to have you join us!
Thanks so much for stopping by, and I hope you'll come back and visit again soon!
Labels:
Paper Piecing,
Papertrey,
Recollections,
Tiddlyinks
Friday, October 26, 2012
Sticker Halloween Cards
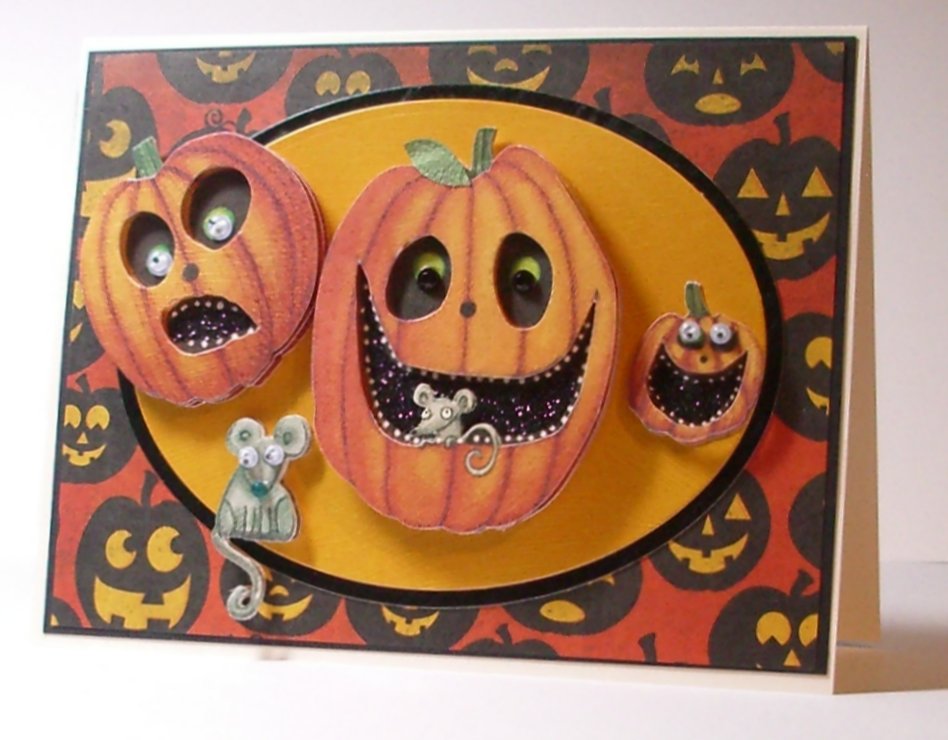
I was at JoAnn's on Wednesday and saw these stickers from K & Co for half price. I couldn't resist! I did, however, want to use them all up ... so I did. These are for our grandchildren. I woke up really early this morning and decided to work on them.
Not a lot of explanation is necessary, I believe. The goldish oval mats are made with the packaging from the stickers, cut with Nestabilities. The black is kind of a vinyl-ish cardstock. The Halloween paper is from a Recollection pad. The sentiment is from a dollar clear set. The card bases are all ivory. I think that's about it! The stickers are quite layered, which you can't really tell from the pictures.
Oh yeah, the grass on this one is a die cut that I made a couple years ago, using a friend's die. Not positive where it's from, but I'm pretty sure it's from My Favorite Things
Wednesday, October 24, 2012
Flutter By Wednesday #211 - A Sketch
Today's Flutter By Wednesday challenge is another sketch by Kathy. Take a look:) What a great sketch - thanks, Kathy! Also, thanks to everyone who joined us last week. I hope we'll have even more participants this week! Please visit the blog for details.
The sketch reminded me of an embossing folder that I have, so I started there. It's from Quickutz. I embossed white cardstock and matted with Pale Plum from Stampin' Up. I added the sheer ribbon before adhering the matting. The butterfly, from Hampton Art, was first stamped on Pale Plum with Perfect Plum ink and cut out. I colored the body with a black marker. Then I stamped the image again with black on white cardstock, added the sentiment, from The Paper Company, and cut them out with a Circle Nestability. I glued the plum butterfly over the black-stamped one, leaving the wings free. The scalloped matting was also cut using a Nestability, again from Pale Plum. I mounted the circle on foam squares. I really wanted to add Stickles to the butterfly, but I was worried it would make the ink bleed.
Thanks so much for stopping by, and I hope you'll come back and visit again soon!
The sketch reminded me of an embossing folder that I have, so I started there. It's from Quickutz. I embossed white cardstock and matted with Pale Plum from Stampin' Up. I added the sheer ribbon before adhering the matting. The butterfly, from Hampton Art, was first stamped on Pale Plum with Perfect Plum ink and cut out. I colored the body with a black marker. Then I stamped the image again with black on white cardstock, added the sentiment, from The Paper Company, and cut them out with a Circle Nestability. I glued the plum butterfly over the black-stamped one, leaving the wings free. The scalloped matting was also cut using a Nestability, again from Pale Plum. I mounted the circle on foam squares. I really wanted to add Stickles to the butterfly, but I was worried it would make the ink bleed.
Thanks so much for stopping by, and I hope you'll come back and visit again soon!
Tuesday, October 23, 2012
Some Answers
No pictures today, but I'll try to explain how I printed on yesterday's card. Thanks for the comments!
I use Microsoft Word for printing on the insides and occasionally outside of my cards, but any word processing program would work. For yesterday's card, I had already done the stamping when I realized I didn't have an acceptable stamp for the sentiment. So, in Word I decided on the font and alignment of my chosen sentiment. I just put it towards the middle of the document and printed it on thin white "typing" paper. I simply put my stamped piece behind the printed page, lined it up the way I wanted it to be printed, and drew around the edges - on the back of the printed page. Then I put some repositionable tape on the back of my stamped panel and stuck it on the front of the printed page using the guide lines on the back. (Holding my stamped image and the printed page up to light allowed me to see through each of them.) I used two pieces of tape on the stamped image to hold it in place and ran it through my printer. I hope that makes sense! Normally I think I would print first and then stamp, but it's nice to know there are options:) Please feel free to ask any more questions you may have. You can leave a comment, or you can email me using the link in my profile - on the right side of my blog.
Thanks so much for stopping by, and I hope you'll come back and visit again soon!
I use Microsoft Word for printing on the insides and occasionally outside of my cards, but any word processing program would work. For yesterday's card, I had already done the stamping when I realized I didn't have an acceptable stamp for the sentiment. So, in Word I decided on the font and alignment of my chosen sentiment. I just put it towards the middle of the document and printed it on thin white "typing" paper. I simply put my stamped piece behind the printed page, lined it up the way I wanted it to be printed, and drew around the edges - on the back of the printed page. Then I put some repositionable tape on the back of my stamped panel and stuck it on the front of the printed page using the guide lines on the back. (Holding my stamped image and the printed page up to light allowed me to see through each of them.) I used two pieces of tape on the stamped image to hold it in place and ran it through my printer. I hope that makes sense! Normally I think I would print first and then stamp, but it's nice to know there are options:) Please feel free to ask any more questions you may have. You can leave a comment, or you can email me using the link in my profile - on the right side of my blog.
Thanks so much for stopping by, and I hope you'll come back and visit again soon!
Monday, October 22, 2012
Warm Wedding Wishes
This is the card I made for the wedding that we went to on Saturday. I made the card to match their invitations. I did this for her sister five weeks ago, and she noticed(!) so I thought I'd do that for this couple, also.
The leaves are stamps from Could 9. I inked them up with Crushed Curry ink from Stampin' Up! and then I "thumped" with a Dusty Durango marker. I used a Really Rust marker to draw the lines around the edges. I printed the sentiment on the computer. (I even dared to do it AFTER everything was stamped, and it worked out!) The leaves were punched from Crushed Curry cardstock with a Tonic punch, sponged with Really Rust ink, and mounted on foam squares. The matting is Real Red. The card base and image panel are ivory.
hanks so much for stopping by, and I hope you'll come back and visit again soon!
The leaves are stamps from Could 9. I inked them up with Crushed Curry ink from Stampin' Up! and then I "thumped" with a Dusty Durango marker. I used a Really Rust marker to draw the lines around the edges. I printed the sentiment on the computer. (I even dared to do it AFTER everything was stamped, and it worked out!) The leaves were punched from Crushed Curry cardstock with a Tonic punch, sponged with Really Rust ink, and mounted on foam squares. The matting is Real Red. The card base and image panel are ivory.
hanks so much for stopping by, and I hope you'll come back and visit again soon!
Labels:
Cloud 9 Designs,
Computer,
Thumping,
Tonic,
Wedding
Sunday, October 21, 2012
"Christmas Sunday"
Well, these two are the last of my Christmas cards for this year. Yippee!! I still have to stamp on the insides, but at least the outsides are all done. I have the labels ready for the envelopes, too. I'm keeping up with my plan to be ALL ready for Christmas by Thanksgiving.
Both of these cards use a Lasting Impressions brass stencil and embossing paste - different kinds of paste, though. This first one uses Glossy White paste. After spreading it through the stencil, I sprinkled it with glitter. I matted with white and mounted on foam squares. The background was embossed with a Sizzix folder.
This second one uses what is simply called "Embossing Paste." Before spreading on the paste, I stippled with Real Red. I added glitter to this one, too, and mounted on foam squares. The patterned paper is from Recollections and is matted with New Leaf from Papertrey Ink. The sentiment panel is matted with Real Red. The ribbon was laying on my table - from a package of some sort, I believe.EDITED TO ADD: I'm linking these cards up the the Christmas Card Challenge blog once again.
Thanks so much for stopping by, and I hope you'll come back and visit again soon!
Wednesday, October 17, 2012
Flutter By Wednesday #210
A new Flutter By Wednesday challenge starts today. Today's challenge is sponsored by Susanna's Custom Art and Card Design. There is a prize this week - a $25 gift certificate to SCACD. The challenge is to use any winged creature! Have fun! Please visit the FBW blog for more details.
Danni generously supplied me with this stamp, available here. I went totally simple with my card this time! I stamped it with Versafine Vintage Sepia ink onto slightly patterned paper and matted with red cardstock. I rounded the corners on the image panel, the matting, and the card base. Even an uncolored fairy gets sparkly wings, however! (I used Star Dust Stickles - my favorite.) The sentiment is from a Hero Arts set, and I thought it went wonderfully with the image! I made this card in February using the same image, if you want to see her colored with Copics.
Thanks so much for stopping by, and I hope you'll come back and visit again soon!
Danni generously supplied me with this stamp, available here. I went totally simple with my card this time! I stamped it with Versafine Vintage Sepia ink onto slightly patterned paper and matted with red cardstock. I rounded the corners on the image panel, the matting, and the card base. Even an uncolored fairy gets sparkly wings, however! (I used Star Dust Stickles - my favorite.) The sentiment is from a Hero Arts set, and I thought it went wonderfully with the image! I made this card in February using the same image, if you want to see her colored with Copics.
Thanks so much for stopping by, and I hope you'll come back and visit again soon!
Tuesday, October 16, 2012
SCS Technique Lover's Challenge
This card is for yesterday's SplitCoastStampers Technique Lover's Challenge - Acrylic Block Collage. You can find the challenge and technique here.
I inked up my long acrylic block with inks from Stampin' Up!: More Mustard, Pumpkin Pie and Really Rust, then misted and applied it to the front of my card. I used stamps from a Gina K set to stamp in the same colors, after masking off the top and bottom. Then I used Chocolate Chip to stamp an image three times (two of them were stamped off first) and also the sentiment, which is from a Hero Arts set.
Thanks so much for stopping by, and I hope you'll come back and visit again soon!
I inked up my long acrylic block with inks from Stampin' Up!: More Mustard, Pumpkin Pie and Really Rust, then misted and applied it to the front of my card. I used stamps from a Gina K set to stamp in the same colors, after masking off the top and bottom. Then I used Chocolate Chip to stamp an image three times (two of them were stamped off first) and also the sentiment, which is from a Hero Arts set.
Thanks so much for stopping by, and I hope you'll come back and visit again soon!
Monday, October 15, 2012
SCS Inspiration Challenge and Fall-To Layout Challenge
I started making this card Saturday morning and finally got a chance to finish it Sunday night. It's for the Inspiration Challenge from Saturday on SplitCoastStampers (My Inspiration picture is to the left) and for Fall-To-Layout #211. Fall colors are so pretty!The leaf stamp I used is from a Cloud 9 set. I inked it up with More Mustard and then put some Really Rust on one side. My matting for the leaves is More Mustard and Really Rust. I thought it needed more, so I added a layer of Chocolate Chip underneath them. I popped up that layer, too. The side layers are Pumpkin Pie - embossed with a Cuttlebug folder brayered with Chocolate Chip, and Chocolate Chip punched with a Martha Stewart punch. The punch makes a trim strip, but I just glued it underneath the embossed piece as a border.
Sunday, October 14, 2012
"Christmas Sunday"
Here are the cards that I told you about last Sunday and promised to post today. I'm linking them up to the Christmas Card Challenge blog. The specific challenge this week is a sketch, but the main challenge is simply to make a Christmas card.
We made a quick stop at JoAnn's Saturday night (a week ago) and my purchase was three stamp sets (that were 50% off) and a package of 20 Martha Stewart stickers that I bought with my 50% off coupon. That's about the only way I shop! I used all 20 of the stickers on cards like these, and they took VERY little time at all. I like the way they turned out, though.
The stickers all had ivory in them, so my card bases are all ivory, too. I scored the double lines with my Scor-Pal. The sentiment is from a Papertrey Ink Christmas set.
I finished the last of my cards this week. I will post my last two next Sunday. I also got my calendars all done. That makes me so happy!
Thanks so much for stopping by, and I hope you'll come back and visit again soon!
We made a quick stop at JoAnn's Saturday night (a week ago) and my purchase was three stamp sets (that were 50% off) and a package of 20 Martha Stewart stickers that I bought with my 50% off coupon. That's about the only way I shop! I used all 20 of the stickers on cards like these, and they took VERY little time at all. I like the way they turned out, though.
The stickers all had ivory in them, so my card bases are all ivory, too. I scored the double lines with my Scor-Pal. The sentiment is from a Papertrey Ink Christmas set.
I finished the last of my cards this week. I will post my last two next Sunday. I also got my calendars all done. That makes me so happy!
Thanks so much for stopping by, and I hope you'll come back and visit again soon!
Friday, October 12, 2012
SCS Free 4 All Challenge
This card is for today's SplitCoastStampers Free 4 All challenge - to use the negative image from a die or punch.
The balloon dies I used are from Quickutz/Lifestyle Crafts. The sentiment is from The Paper Company. After cutting out the balloons and stamping the sentiment, I embossed with a Cuttlebug Swiss Dots folder, added the patterned paper, and matted with black. I decided to add two of the balloons that I cut out, too, so I sponged some Rose Romance ink around the edges and mounted them on foam squares. The patterned paper is from My Mind's Eye.
Thanks so much for stopping by, and I hope you'll come back and visit again soon!
The balloon dies I used are from Quickutz/Lifestyle Crafts. The sentiment is from The Paper Company. After cutting out the balloons and stamping the sentiment, I embossed with a Cuttlebug Swiss Dots folder, added the patterned paper, and matted with black. I decided to add two of the balloons that I cut out, too, so I sponged some Rose Romance ink around the edges and mounted them on foam squares. The patterned paper is from My Mind's Eye.
Thanks so much for stopping by, and I hope you'll come back and visit again soon!
Wednesday, October 10, 2012
Flutter By Wednesday #209 - Kraft
Another Wednesday has rolled around - time for a new Flutter By Wednesday challenge. Today Danni has challenged us to use Kraft on our creations. I used lots! :)
The image is a digital one from Tiddly Inks, printed on Kraft cardstock. (You can find the image here.) I won it a couple years ago from Danni, so I thought it would be great to use it on a FBW challenge. I colored her with Copic markers and added Star Dust Stickles to her wings. I matted her with Real Red cardstock. The sentiment is from Papertrey Ink. You'll be seeing that again soon!
Thanks for those of you who joined the challenge last week. We look forward to seeing your creations again this week. You can find the details on the FBW blog.
Thanks so much for stopping by, and I hope you'll come back and visit again soon!
The image is a digital one from Tiddly Inks, printed on Kraft cardstock. (You can find the image here.) I won it a couple years ago from Danni, so I thought it would be great to use it on a FBW challenge. I colored her with Copic markers and added Star Dust Stickles to her wings. I matted her with Real Red cardstock. The sentiment is from Papertrey Ink. You'll be seeing that again soon!
Thanks for those of you who joined the challenge last week. We look forward to seeing your creations again this week. You can find the details on the FBW blog.
Thanks so much for stopping by, and I hope you'll come back and visit again soon!
Labels:
Christmas,
Flutter By Wednesday,
Papertrey,
Tiddlyinks
Monday, October 8, 2012
Fall Birthday
Today's SplitCoastStampers Clean and Simple challenge is to use plaid. Since I was up early enough (PLENTY early!) I thought I would make a card for the challenge.
I stamped the leaf with one of the new stamps that I got on Friday night. It's from Cloud 9 Designs. I stamped it with More Mustard ink from Stampin' Up, then stamped it again without reinking. The sentiment is from Impression Obsession and is stamped with Really Rust. The plaid background paper is from a Recollections matstack. The card base and image panel are ivory and the matting is Really Rust. I mounted the image panel on foam squares.
Thanks so much for stopping by, and I hope you'll come back and visit again soon!
I stamped the leaf with one of the new stamps that I got on Friday night. It's from Cloud 9 Designs. I stamped it with More Mustard ink from Stampin' Up, then stamped it again without reinking. The sentiment is from Impression Obsession and is stamped with Really Rust. The plaid background paper is from a Recollections matstack. The card base and image panel are ivory and the matting is Really Rust. I mounted the image panel on foam squares.
Thanks so much for stopping by, and I hope you'll come back and visit again soon!
Sunday, October 7, 2012
"Christmas Sunday"
Another Christmas card done:) I'm linking it up to the Christmas Card Challenge blog.
The embossing was done with a Lasting Impressions stencil and my BIGkick. I colored the holly leaves and berries with Copic markers and added some red Stickles to the berries. The patterned paper is from a Recollections stack. The matting is all Real Red from Stampin' Up! I mounted the NOEL panel on foam squares.
We made a stop at JoAnn's last night, and I bought some Martha Stewart Christmas stickers with my 50% off coupon. After we got home, I made twenty cards with them! They are all about the same size and similar, but all different. (Except I think there were two that were identical.) The cards are all the same, with the different stickers. I will share them with you next week. That makes 74 done now - yippee!! Only about 5 - 10 left to make. I do still have to stamp the sentiment on on the insides, though.
Thanks so much for stopping by, and I hope you'll come back and visit again soon!
The embossing was done with a Lasting Impressions stencil and my BIGkick. I colored the holly leaves and berries with Copic markers and added some red Stickles to the berries. The patterned paper is from a Recollections stack. The matting is all Real Red from Stampin' Up! I mounted the NOEL panel on foam squares.
We made a stop at JoAnn's last night, and I bought some Martha Stewart Christmas stickers with my 50% off coupon. After we got home, I made twenty cards with them! They are all about the same size and similar, but all different. (Except I think there were two that were identical.) The cards are all the same, with the different stickers. I will share them with you next week. That makes 74 done now - yippee!! Only about 5 - 10 left to make. I do still have to stamp the sentiment on on the insides, though.
Thanks so much for stopping by, and I hope you'll come back and visit again soon!
Labels:
Christmas,
Dry Embossing,
Lasting Impressions,
Recollections
Saturday, October 6, 2012
CAS Birthday
I made this card in the middle of the night Thursday night when I couldn't sleep. Always a good time for crafting! Totally Clean and Simple.
I started with my new (to me) Cuttlebug border folder from the Roman Bath set. I brayered it with Stampin' Up!'s More Mustard and then added a little bit of Really Rust before embossing a strip of white cardstock. I matted with Really Rust. The sentiment, from Stampendous, is stamped with Really Rust, as well.
My plans to do a lot of stamping yesterday didn't materialize. I did, however, make myself a "to-do" list of important things and I got them all done. Yippee! Maybe I'll have another chance to stamp again soon.
Thanks so much for stopping by, and I hope you'll come back and visit again soon!
I started with my new (to me) Cuttlebug border folder from the Roman Bath set. I brayered it with Stampin' Up!'s More Mustard and then added a little bit of Really Rust before embossing a strip of white cardstock. I matted with Really Rust. The sentiment, from Stampendous, is stamped with Really Rust, as well.
My plans to do a lot of stamping yesterday didn't materialize. I did, however, make myself a "to-do" list of important things and I got them all done. Yippee! Maybe I'll have another chance to stamp again soon.
Thanks so much for stopping by, and I hope you'll come back and visit again soon!
Friday, October 5, 2012
Embedded Butterflies
I have sat down several times lately in my stamping area and come up empty. Not sure what the problem is. So, last night I told myself, "Just make something quick to get you started again!" This is what I came up with.
The butterflies were "cards parts." Sorry, I don't know who makes the stamps or dies. (If you really want to know, please email me or leave me a comment and I'm sure I can find out fairly soon.) I glued them on to black cardstock and embossed the entire panel with a Cuttlebug Roman Bath folder. They appear to be part of the black cardstock with this technique. I semi-matted with a piece of the same textured turquoise paper. The card base is ivory. I don't have my grandson here today so hopefully I will get some more stamping done. I'm missing it!
Thanks so much for stopping by, and I hope you'll come back and visit again soon!
The butterflies were "cards parts." Sorry, I don't know who makes the stamps or dies. (If you really want to know, please email me or leave me a comment and I'm sure I can find out fairly soon.) I glued them on to black cardstock and embossed the entire panel with a Cuttlebug Roman Bath folder. They appear to be part of the black cardstock with this technique. I semi-matted with a piece of the same textured turquoise paper. The card base is ivory. I don't have my grandson here today so hopefully I will get some more stamping done. I'm missing it!
Thanks so much for stopping by, and I hope you'll come back and visit again soon!
Wednesday, October 3, 2012
Flutter By Wednesday - Pixie Dust!
Wow, Wednesdays sure roll around quickly! It's time for a new challenge from the Flutter By Wednesday blog. Danni's challenge for you all this week is "Pixie Dust" - use lots of sparkle on your card, and don't forget your butterfly or fairy. I love sparkle and most often forget to use it. This week's challenge is sponsored by Sweet 'N Sassy Stamps. One lucky participant will win three digital stamps from SNSS!
The FBW Design Team was generously given digital images to work with. I chose to use Coneflowers and Butterfly. I printed the image and then cut it out with a Nestability. I sponged the image with Stampin' Up! Soft Sky ink before removing from the die. Then I colored it with Copic markers. I also added just a thin line of brown along the edge with a marker. I added Star Dust Stickles to the flowers and also the butterfly. I mounted the image panel on foam squares. The background piece is glitter paper from a Die Cuts With a View matstack. I matted it with Chocolate Chip cardstock from SU! We'd love to have you join the challenge this week! Please visit the blog for details and to link up your card.
Thanks so much for stopping by, and I hope you'll come back and visit again soon!
Labels:
Flutter By Wednesday,
Nestabilities,
Sweet 'N Sassy
Monday, October 1, 2012
October Calendar Page
Gosh - I almost forgot to post my calendar page today! I seem to have misplaced the list I so carefully made of the "ingredients" of my pages, so I had to figure it out this morning. Sure hope I find the list before next month, because I used a digital image for November and I need to figure out where it came from!
If you would like to make your own calendar pages, please feel free to use my files. You can find the links at the top of my page - under the blog title. I'd love to hear from you if you choose to use them! For this page, I used The Paper Studios House Mouse stamp and colored with Prismacolor pencils and probably used Goo Gone. I need to do that more! I matted with black shimmery paper. The sentiment is Halloween Cobwebs from Repeat Impressions.
Thanks so much for stopping by, and I hope you'll come back and visit again soon!
If you would like to make your own calendar pages, please feel free to use my files. You can find the links at the top of my page - under the blog title. I'd love to hear from you if you choose to use them! For this page, I used The Paper Studios House Mouse stamp and colored with Prismacolor pencils and probably used Goo Gone. I need to do that more! I matted with black shimmery paper. The sentiment is Halloween Cobwebs from Repeat Impressions.
Thanks so much for stopping by, and I hope you'll come back and visit again soon!
Saturday, September 29, 2012
Happy Birthday, Mom!
My mom's birthday is on Tuesday (same as our grandson, Andrew) and this is the card I made her. I'll be seeing her today.
Kind of hard to tell in the picture, but the image panel is a soft pink (Pink Pirouette from Stampin' Up!) I stamped with Versamark and embossed with Detail White Embossing powder. I colored with Tim Holtz Distress markers, embossed with a Swiss Dots Cuttlebug folder, and added Stickles to the flower. I matted with Riding Hood Red, also from Stampin' Up! The patterned paper is from Recollections and is matted with the same red. The sentiment is from Papertrey Ink and is inked with the same green Tim Holtz marker. The rose is from an Inkadinkado set.
Thanks so much for stopping by, and I hope you'll come back and visit again soon!
Kind of hard to tell in the picture, but the image panel is a soft pink (Pink Pirouette from Stampin' Up!) I stamped with Versamark and embossed with Detail White Embossing powder. I colored with Tim Holtz Distress markers, embossed with a Swiss Dots Cuttlebug folder, and added Stickles to the flower. I matted with Riding Hood Red, also from Stampin' Up! The patterned paper is from Recollections and is matted with the same red. The sentiment is from Papertrey Ink and is inked with the same green Tim Holtz marker. The rose is from an Inkadinkado set.
Thanks so much for stopping by, and I hope you'll come back and visit again soon!
Thursday, September 27, 2012
Happy Fourth Birthday, Andrew!
Can you believe it - our oldest grandson, Andrew, will be FOUR next week! How is that even possible?He has decided he is going to be Superman for Halloween, and so I've made him this card for his birthday. I used an image I found on-line.I cut the image out and popped it up on foam squares. The ovals were cut with Nestabilities. The patterned paper is from Die Cuts With a View and the matting cardstock is Riding Hood Red from Stampin' Up!.
Edited to add: The inside says "Hope you have a SUPER birthday!")
Note to Sharon G: Thanks so much for the nice comment. I just searched for "Superman images" and found this one that I liked the best. If you write to me, I can send it to you. LJNeus @ hotmail . com - without the spaces.
Thanks so much for stopping by, and I hope you'll come back and visit again soon!
Wednesday, September 26, 2012
Flutter By Wednesday #207
Time for a new Flutter By Wednesday challenge - #207. Please check out the details and the cool cards by the design team on Danni's Flutter By Wednesday challenge blog!
This is a "card parts" card. I had brayered left-over navy blue ink onto some ivory cardstock and it was sitting on my table. I liked the texture of the color, so I had kept it. The black piece at the top of the ivory/navy panel was on my table, too. I stamped the swirl (from Tattered Angels) with Night of Navy ink from Stampin' Up!. Then I stamped the sentiment (from Hero Arts) with black ink. The butterfly is punched with a Martha Stewart punch from shimmery navy paper. A note about the swirl stamp: This is the stamp I used for the wedding card that I couldn't post because I deleted it from the camera accidentally. I think I stamped it three times for that card before I realized that I wasn't doing a poor job of stamping - the stamp is just "distressed" and is "missing" parts! The card base is ivory.
Thanks so much for stopping by, and I hope you'll come back and visit again soon!
This is a "card parts" card. I had brayered left-over navy blue ink onto some ivory cardstock and it was sitting on my table. I liked the texture of the color, so I had kept it. The black piece at the top of the ivory/navy panel was on my table, too. I stamped the swirl (from Tattered Angels) with Night of Navy ink from Stampin' Up!. Then I stamped the sentiment (from Hero Arts) with black ink. The butterfly is punched with a Martha Stewart punch from shimmery navy paper. A note about the swirl stamp: This is the stamp I used for the wedding card that I couldn't post because I deleted it from the camera accidentally. I think I stamped it three times for that card before I realized that I wasn't doing a poor job of stamping - the stamp is just "distressed" and is "missing" parts! The card base is ivory.
Thanks so much for stopping by, and I hope you'll come back and visit again soon!
Tuesday, September 25, 2012
Welcome, Baby Girl!
Even though I had already made and given a card to my niece at her baby shower, I made her another when we got to go visit her and meet the new little one.
I love this Baby stamp from Repeat Impressions. I paperpieced her jammies and colored the rest of her with markers. I mounted the image panel on Pop Dots. The patterned paper is from Recollections and the sentiment is from Repeat Impressions.
Thanks so much for stopping by, and I hope you'll come back and visit again soon!
I love this Baby stamp from Repeat Impressions. I paperpieced her jammies and colored the rest of her with markers. I mounted the image panel on Pop Dots. The patterned paper is from Recollections and the sentiment is from Repeat Impressions.
Thanks so much for stopping by, and I hope you'll come back and visit again soon!
Monday, September 24, 2012
Sympathy Daisies
The mother of a friend passed away recently, and this is the card I sent her.
I stamped the daisies (from Inkadinkado) onto Baja Breeze cardstock (from Stampin' Up!). I "colored" the daisies with bleach to make them white and colored the leaves and flower centers with markers. I added Star Dust Stickles to the flower centers. I rounded the bottom corners on the image panel, the black matting, and the card front. The sentiment is from Hero Arts. I added a couple scored lines with my Scor-Pal.
Thanks so much for stopping by, and I hope you'll come back and visit again soon!
I stamped the daisies (from Inkadinkado) onto Baja Breeze cardstock (from Stampin' Up!). I "colored" the daisies with bleach to make them white and colored the leaves and flower centers with markers. I added Star Dust Stickles to the flower centers. I rounded the bottom corners on the image panel, the black matting, and the card front. The sentiment is from Hero Arts. I added a couple scored lines with my Scor-Pal.
Thanks so much for stopping by, and I hope you'll come back and visit again soon!
Sunday, September 23, 2012
Christmas Sunday - Embossed Embossing
This needs to be one of my quickest posts ever! Not like you can tell, but it's after midnight on Saturday night and I want to get to bed. But here goes:)
I made this card for a challenge on my stamping group. The challenge was to make an embossed embossing card. I embossed the snowflakes with a Cuttlebug folder and textured, white-core light blue cardstock. I sanded down the embossing to reveal the white. Then I brayered Versamark over the embossing and embossed with clear embossing powder. I punched a few darker blue snowflakes and added them, with pearl centers. The sentiment is a dollar stamp from Michael's from a few years ago, embossed with white embossing powder. I matted with the same darker blue as the snowflakes.
I'm linking this card up to the Christmas Card Challenge blog.
Thursday, September 20, 2012
Happy Anniversary Harriet and Bruce!
Last Thursday was my friend Harriet's anniversary. I sent her card a bit late, but it finally arrived so I can post it here. Hope you had a great day, Harriet!
I figured for a fellow Flutter By Wednesday team member, I would use a butterfly:) The swirly stamp for the background and the butterfly are both from a set by Hampton Arts. I used Memento London Fog ink for the background. I paper-pieced the butterfly using Papertrey Ink cardstock and added Stardust Stickles to it. I placed it on an oval cut with Nestabilities and mounted on foam squares. The sentiment is from PSX.
Thanks so much for stopping by, and I hope you'll come back and visit again soon!
I figured for a fellow Flutter By Wednesday team member, I would use a butterfly:) The swirly stamp for the background and the butterfly are both from a set by Hampton Arts. I used Memento London Fog ink for the background. I paper-pieced the butterfly using Papertrey Ink cardstock and added Stardust Stickles to it. I placed it on an oval cut with Nestabilities and mounted on foam squares. The sentiment is from PSX.
Thanks so much for stopping by, and I hope you'll come back and visit again soon!
Wednesday, September 19, 2012
Flutter By Wednesday #206
Wednesday brings a new challenge from Danni's Flutter By Wednesday. The challenge this week is this sketch by Kathy. Check out the blog for the details and to see the creations by the design team.
Here is the sketch. I used Cuttlebug border folders for my "strips" and used my Scor-Pal to score lines between the folders. I embossed the butterfly (from Hampton Art) with white embossing powder on shimmery white paper. I colored with Stampin' Up! markers and then wiped off the embossing with a tissue. I matted with white cardstock and mounted on Pop Dots. I added tiny pearls to the corners. I added the ribbons and then the bow. We'd love to have you join us this week.Thanks so much for stopping by, and I hope you'll come back and visit again soon!
Labels:
Cuttlebug Folder,
Flutter By Wednesday,
Hampton Art
Tuesday, September 18, 2012
What's Been Going On With Us - Just a Little Chit-Chat
I have no card to share today, but I thought I'd just briefly share what's been going on in my life.
The weekend before last we went camping with friends. We go every year at this time. I'd love to camp more, but there just doesn't seem to be time. We still tent camp, and I'm very happy with that. How about a picture of our "home" for the weekend.
It was actually pretty chilly the first night, but a beautiful sunny weekend without a drop of rain. Unheard of with camping with this group!
Thursday we made an offer on a townhouse and it was accepted by the sellers on Thursday night. However, it's a short sale, so now it's in the banks' (two mortgages) hands and we won't find out if they accept it for several months yet. We're trying not to get too excited since it's not a for-sure thing, but we're keeping our fingers crossed. It's really everything we've dreamed of and more. (We haven't had huge dreams - just things like a whirlpool and room for guests, etc.) When/if the offer is accepted by the bank, we will have thirty days until we close. We'll list our house at that time and hopefully it will sell FAST!!
Saturday morning on our walk, we noticed at the end of someone's driveway were two teak bookcases with a "FREE" sign on them. My stamping table (our old dining room table) is teak and I will need shelves for my new stamping room - assuming we get the new house. So, after our walk, we hooked up the trailer and went to pick them up. Sunday, after doing lots of other work, I unloaded my old shelves, put one of the new ones in my stamping area, and got it organized. The second one will not fit very well in my current space, so it will stay in the laundry room or shed until we move. Here is what it looks like:
Today is our daughter's 37th birthday. Amazing! She and her family will be here for a visit soon - arriving on Friday. That will be great. Our grandson, Andrew, will be four in a couple weeks, too. Time sure flies!
Plus, I still babysit our grandson, Owen, every day. How lucky can I be! He is such a sweetie and so good and so smart. Gee, could I possibly be a grandma speaking! LOL!
I did take some time for stamping yesterday, though. I finished up my 2013 calendar for July. The pieces had all been prepared quite a long time ago and I finally got them all glued together. I also worked on the August page, and got that almost finished up, too. Then I'll get September done and I'll be caught up on them. Hopefully, I'll work ahead and get them finished up by maybe the end of October.
Anyone still reading this far??? :) I have cards ready to share with you for at least a few days coming up. Thanks so much for sticking with me.
Thanks so much for stopping by, and I hope you'll come back and visit again soon!
The weekend before last we went camping with friends. We go every year at this time. I'd love to camp more, but there just doesn't seem to be time. We still tent camp, and I'm very happy with that. How about a picture of our "home" for the weekend.
It was actually pretty chilly the first night, but a beautiful sunny weekend without a drop of rain. Unheard of with camping with this group!
Thursday we made an offer on a townhouse and it was accepted by the sellers on Thursday night. However, it's a short sale, so now it's in the banks' (two mortgages) hands and we won't find out if they accept it for several months yet. We're trying not to get too excited since it's not a for-sure thing, but we're keeping our fingers crossed. It's really everything we've dreamed of and more. (We haven't had huge dreams - just things like a whirlpool and room for guests, etc.) When/if the offer is accepted by the bank, we will have thirty days until we close. We'll list our house at that time and hopefully it will sell FAST!!
Saturday morning on our walk, we noticed at the end of someone's driveway were two teak bookcases with a "FREE" sign on them. My stamping table (our old dining room table) is teak and I will need shelves for my new stamping room - assuming we get the new house. So, after our walk, we hooked up the trailer and went to pick them up. Sunday, after doing lots of other work, I unloaded my old shelves, put one of the new ones in my stamping area, and got it organized. The second one will not fit very well in my current space, so it will stay in the laundry room or shed until we move. Here is what it looks like:
Today is our daughter's 37th birthday. Amazing! She and her family will be here for a visit soon - arriving on Friday. That will be great. Our grandson, Andrew, will be four in a couple weeks, too. Time sure flies!
Plus, I still babysit our grandson, Owen, every day. How lucky can I be! He is such a sweetie and so good and so smart. Gee, could I possibly be a grandma speaking! LOL!
I did take some time for stamping yesterday, though. I finished up my 2013 calendar for July. The pieces had all been prepared quite a long time ago and I finally got them all glued together. I also worked on the August page, and got that almost finished up, too. Then I'll get September done and I'll be caught up on them. Hopefully, I'll work ahead and get them finished up by maybe the end of October.
Anyone still reading this far??? :) I have cards ready to share with you for at least a few days coming up. Thanks so much for sticking with me.
Thanks so much for stopping by, and I hope you'll come back and visit again soon!
Monday, September 17, 2012
Elegant Birthday
I made a wedding card on Saturday (for the wedding later that day!), took pictures of it, and then on Sunday morning I accidentally deleted them. (I was cleaning off the memory card, and I just automatically deleted all the uncropped card pictures, because those are the ones I don't need. Oops, I hadn't cropped them yet!) That didn't make me happy, as I liked the card and also because I finally had something to post. Oh well, worse things could happen, for sure!!
After a very busy Sunday, I made this card last evening. The die-cut matting was sitting on my desk, along with the square of silver for it. So, I just needed to cut a white square for on top of the silver and stamp something on it. Both stamps I used are from Technique Tuesday. I stamped the swirl with Memories Soft Silver and the sentiment with black. I added some red gems and mounted on Pop Dots. The patterned paper is from The Paper Studio and is matted with silver and black.
Gosh, we've had lots going on! I think maybe tomorrow I'll do a personal post, telling what we've been up to and why I haven't had any time to stamp. Sure was fun to have some time last night, though. Shoot - when I went to publish this post, I found out that I DID have a card to share yesterday for Christmas Sunday! I guess you'll get it next week, instead.
Thanks so much for stopping by, and I hope you'll come back and visit again soon!
After a very busy Sunday, I made this card last evening. The die-cut matting was sitting on my desk, along with the square of silver for it. So, I just needed to cut a white square for on top of the silver and stamp something on it. Both stamps I used are from Technique Tuesday. I stamped the swirl with Memories Soft Silver and the sentiment with black. I added some red gems and mounted on Pop Dots. The patterned paper is from The Paper Studio and is matted with silver and black.
Gosh, we've had lots going on! I think maybe tomorrow I'll do a personal post, telling what we've been up to and why I haven't had any time to stamp. Sure was fun to have some time last night, though. Shoot - when I went to publish this post, I found out that I DID have a card to share yesterday for Christmas Sunday! I guess you'll get it next week, instead.
Thanks so much for stopping by, and I hope you'll come back and visit again soon!
Wednesday, September 12, 2012
Flutter By Wednesday - Favorite Color
This week's Flutter By Wednesday challenge is to use your favorite color. We are sponsored this week by Paper Makeup Stamps. Please visit the Flutter By Wednesday blog for the challenge details and to see what Danni's great team has created. We'd love to have you join us! One lucky participant will receive a $15 gift certificate from PMS.
We on the design team were given the opportunity to choose a Paper Makeup digital image to use on our card. I chose Sprout, found here. I think you can tell that my favorite color is green:) I printed out the image and colored with Copics. I also added some Star Dust Stickles to her wing. I cut her out with a Blossom Nestability. The patterned paper is from a Recollections matstack. The sentiment is from a Fiskars stamp set.
Thanks so much for stopping by, and I hope you'll come back and visit again soon!
We on the design team were given the opportunity to choose a Paper Makeup digital image to use on our card. I chose Sprout, found here. I think you can tell that my favorite color is green:) I printed out the image and colored with Copics. I also added some Star Dust Stickles to her wing. I cut her out with a Blossom Nestability. The patterned paper is from a Recollections matstack. The sentiment is from a Fiskars stamp set.
Thanks so much for stopping by, and I hope you'll come back and visit again soon!
Sunday, September 9, 2012
Christmas Sunday
A short post for today. I have the cards done, but don't have much time for writing. These cards both use images from the same Paper Inspirations set that I used last week. My goal was to use all of the images. I'm close, but I'm not sure I'll end up using them all.
This first one uses the mistletoe image. I colored with Copics. I matted the image with white and matted with Pop Dots. I used Star Dust Stickles for the berries. (I've heard they're white, but have never actually checked that out!) The background is embossed with a Cuttlebug folder.
I used the bow image for this card. I colored with a Tombow marker and spritzed with a glittery spray. I mounted on foam squares. I scored a couple lines on the green layer with my Scor-Pal. I punched the border with a Martha Stewart border punch. The patterned paper is from a Recollection matstack.
I'm linking this up to the Christmas Card Challenge blog.
Thanks so much for stopping by, and I hope you'll come back and visit again soon!
This first one uses the mistletoe image. I colored with Copics. I matted the image with white and matted with Pop Dots. I used Star Dust Stickles for the berries. (I've heard they're white, but have never actually checked that out!) The background is embossed with a Cuttlebug folder.
I used the bow image for this card. I colored with a Tombow marker and spritzed with a glittery spray. I mounted on foam squares. I scored a couple lines on the green layer with my Scor-Pal. I punched the border with a Martha Stewart border punch. The patterned paper is from a Recollection matstack.
I'm linking this up to the Christmas Card Challenge blog.
Thanks so much for stopping by, and I hope you'll come back and visit again soon!
Friday, September 7, 2012
Thinking of You
A simple "thinking of you" card for today.
The stamps are from a Fiskars set. I colored the stamps themselves with Tombow markers, then colored in the larger flowers with a marker after stamping. The butterflies were punched with a Martha Stewart punch out of sparkly cardstock. I added the antennae with markers and also pearls to the bodies. I added pearls to the larger flower centers too.
Thanks so much for stopping by, and I hope you'll come back and visit again soon!
The stamps are from a Fiskars set. I colored the stamps themselves with Tombow markers, then colored in the larger flowers with a marker after stamping. The butterflies were punched with a Martha Stewart punch out of sparkly cardstock. I added the antennae with markers and also pearls to the bodies. I added pearls to the larger flower centers too.
Thanks so much for stopping by, and I hope you'll come back and visit again soon!
Wednesday, September 5, 2012
Flutter By Wednesday - Birthday
Thank you all for fluttering with us last week at Flutter By Wednesday! Now it's time for a new challenge. This week's challenge is to make a birthday card and of course include a butterfly or fairy on your card. You can find the details and the creations by the Danni's design team on the Flutter By Wednesday blog.
For my card, I started with a digital image from Tiddlyinks that I won from Danni a few years ago. I colored her with Copics and added Stickles to her wings. I cut her with a Nestability and matted with blue, cut with another Nestability. I mounted the image panel on foam squares. The patterned paper is from a stack from Recollections and the sentiment is from Inkadinkado.
We'd love to have you join us this week!
Thanks so much for stopping by, and I hope you'll come back and visit again soon!
For my card, I started with a digital image from Tiddlyinks that I won from Danni a few years ago. I colored her with Copics and added Stickles to her wings. I cut her with a Nestability and matted with blue, cut with another Nestability. I mounted the image panel on foam squares. The patterned paper is from a stack from Recollections and the sentiment is from Inkadinkado.
We'd love to have you join us this week!
Thanks so much for stopping by, and I hope you'll come back and visit again soon!
Tuesday, September 4, 2012
Outta This World Birthday
Another "Card Parts" card for today. It was nice to have a little stamping time, and card parts make things a little quicker.
I've had this stamped background for quite a while. It came in a few boxes of "stuff" from a co-worker of my son. I'm pretty sure she was a Stampin' Up! demo, so I'm assuming the inks, paper and stamp were SU. As you can see, it's done with glossy cardstock. The image I used was from a Recollections set. I colored with a Distress marker and I added googlie eyes and some sparkle. I also added some doodling around the edges. The matting was done with a Nestability. I printed the sentiment on my computer, matted with black, and mounted on foam squares.
Thanks so much for stopping by, and I hope you'll come back and visit again soon!
I've had this stamped background for quite a while. It came in a few boxes of "stuff" from a co-worker of my son. I'm pretty sure she was a Stampin' Up! demo, so I'm assuming the inks, paper and stamp were SU. As you can see, it's done with glossy cardstock. The image I used was from a Recollections set. I colored with a Distress marker and I added googlie eyes and some sparkle. I also added some doodling around the edges. The matting was done with a Nestability. I printed the sentiment on my computer, matted with black, and mounted on foam squares.
Thanks so much for stopping by, and I hope you'll come back and visit again soon!
Labels:
Birthday,
Card Parts Cards,
Nestabilities,
Recollections
Monday, September 3, 2012
True Thyme Birthday
This embossed background was in my Card Parts box, so I decided to finally use it. I'm not positive, but I believe it was Stampin' Up! True Thyme ink that I used to brayer on the Cuttlebug folder before I embossed with it. I matted it with True Thyme. The sentiment is from a Stampendous set. It's matted with True Thyme and mounted on foam squares. The leafy pieces were punched with an EK Success punch. That's all there is to it!
Thanks so much for stopping by, and I hope you'll come back and visit again soon!
Labels:
Card Parts Cards,
Cuttlebug Folder,
EK Success,
Stampendous
Sunday, September 2, 2012
Christmas Sunday
Two more cards for my Christmas card stash! I'm keeping on schedule, I think.
Both of these cards are made with stamps from a Paper Inspirations set. It includes six images and six sentiments. I used Kraft and Riding Hood Red for both, and an ivory card base. I did all the stamping with Versamagic Vintage Sepia ink. I colored both images with Copics. I added a little glaze to the berries and gems to dot the i's. I embossed a frame on this one with a Nestability.
I did a little hand-doodling around the image on this one. I mounted the matted image on foam squares.
I am linking them up to the Christmas Card Challenge blog.
Thanks so much for stopping by, and I hope you'll come back and visit again soon!
Saturday, September 1, 2012
September Calendar Page
Oh my gosh - it's September today! Unbelievable! Here is my September calendar page. If you are interested in my Excel file for printing your own blank pages, you can find the files in the link beneath my blog title.
I used an Inkadinkado stamp and Kaliedacolor ink for the leaves and scored along the top and bottom. I punched the border on some textured kraft-colored paper with a Fiskars punch for the matting.
Thanks so much for stopping by, and I hope you'll come back and visit again soon!
I used an Inkadinkado stamp and Kaliedacolor ink for the leaves and scored along the top and bottom. I punched the border on some textured kraft-colored paper with a Fiskars punch for the matting.
Thanks so much for stopping by, and I hope you'll come back and visit again soon!
Subscribe to:
Posts (Atom)