Monday, May 2, 2016

Happy Retirement, Jim!

Today is my husband's last day of work. Yahoo!!! Retirement, here we come! :)

Here is the card I made for him. The stamps are both from a My Favorite Things stamp set. I stamped with Versamark and embossed with detail white embossing powder. I rounded all of the bottom corners. The image panel is mounted on foam squares.

Thanks so much for stopping by, and I hope you'll come back and visit again soon!

Sunday, May 1, 2016

May Calendar Page

A very simple page for May. The stamps are from a set from Papertrey Ink. That's it:) I used my MISTI to make the stamping of fifteen calendars go a lot faster and be more precise.

You can find links to my Excel file for printing calendars, along with cutting instructions, on the blog page found under my blog title.

Thanks so much for stopping by, and I hope you'll come back and visit again soon!

Saturday, April 30, 2016

Graduation Congrats

This is the same layout as yesterday's card, but it has a completely different feel to it. It's for our former next-door neighbor who I babysat until he was three. I can't believe he's graduating already! The school colors are blue and yellow, in case you couldn't guess:)

I embossed the background with an old Cuttlebug folder. The graduation cap was done with Lifestyle Crafts dies. The two stamps are from a retired Stampin' Up! set called "Congratulations." (It was in my stack of stamps to use, but I only used these two stamps and called it good enough.) I used the "faux embossing" technique on the "Congratulations" but it's not as effective as it is on green. The blue strip is mounted on foam squares.

Thanks so much for stopping by, and I hope you'll come back and visit again soon!

Friday, April 29, 2016

Patterned Paper Birthday

I love cards with cut-outs - both full and partial. But, like so many other techniques, I forget to do them! So, on today's card I did it. :)

I used some more beautiful patterned paper for the background. This is from The Paper Studio's Mirabelle. I matted with pretty brown cardstock - Soft Suede from Stampin' Up! I placed the two layers together and cut the smaller circle with a Spellbinders die. Then I used the next bigger circle to enlarge the circle in the patterned paper. I mounted that panel on foam squares. The sentiment from Inkadinkado was stamped with matching ink. The butterfly was cut with a Memory Box die. I had the perfect color deep red cardstock that I first cut the butterfly from, but the brown actually looked better. The butterfly is also mounted on a foam square.

Edited to add: The embossing folder I used on Wednesday's card is Cuttlebug Anna Griffin Matelasse.

Thanks so much for stopping by, and I hope you'll come back and visit again soon!

Thursday, April 28, 2016

"Sketchy" Birthday

This die-cut and stamped sentiment panel was also in with my ivory cardstock, so I decided to use it. It's mounted on foam squares. I cut another panel for my stamping and  yet another from the glittery cardstock for the bottom layer. The flowers are from a retired Stampin' Up! set that I've already used. It's called "Delight in Life." I happened to watch a video on Gina K's Stamp TV by Melanie Muenchinger in which she colored her flowers like this. She literally just scribbled on her flowers and they look awesome! So, I gave it a shot, and I like the way they turned out. You can find the video here - if the link works.

Thanks so much for stopping by, and I hope you'll come back and visit again soon!

Wednesday, April 27, 2016

Another Simple Birthday

I had this die-cut stitched rectangle piece in with my ivory cardstock. I need to remember to use these stitched dies!! The sentiment is from Impression Obsession. The background (also ivory) was embossed with a Cuttlebug Anna Griffin folder and matted with black. The cardbase is ivory.

Edited to add: This embossing folder is Cuttlebug Anna Griffin Matelasse.

Thanks so much for stopping by, and I hope you'll come back and visit again soon!

Tuesday, April 26, 2016

Bright Friendship

A "just because" card. I just happened to run across this stamp given to me by a friend and it popped on to a card. I've had the pink piece on my table for a few weeks. I embossed it on textured cardstock with a Darice folder and then sanded it down so the white core showed. I matted it with black. I wanted something different, so I used the turquoise textured for the background. Both pieces are from a "Bright" matstack from Die Cuts With a View. The sentiment was stamped with Versafine black ink and embossed with clear embossing powder. It's from Rubbernecker.

Thanks so much for stopping by, and I hope you'll come back and visit again soon!

Monday, April 25, 2016

Blush and Pink Color Swap

I made this card for the color swap challenge in my small stamping group. The colors are blush and green. Since this color ink (from Stampin' Up!) is called "Blush Blossom," I thought it qualified!

The border was stamped with the last stamps of my set called "Beautiful Borders." I scored the lines and matted with green cardstock. The blush background piece was stamped with the sentiment (from the same stamp set) and then embossed with a Sizzix embossing folder. I matted that with the same green and added it to a white card base.

Thanks so much for stopping by, and I hope you'll come back and visit again soon!

Sunday, April 24, 2016

Happy Mother's Day

I suppose I should wait for Mother's Day to post this card, but it's done now, so I'll share it. I made this card for my mother-in-law. The flowers were stamped and die-cut with a Stampin' Up! set. The leaves were die-cut with a die from the same set. I added enamel dots for the flower centers. Two of the three flowers are mounted on foam squares. The sentiment is from Verve. I colored the little flower and added a yellow pearl for the center. I embossed the background with a Darice folder and matted with matching green.

Thanks so much for stopping by, and I hope you'll come back and visit again soon!

Saturday, April 23, 2016

Celebrate #2

The second (and last) card made with the Stampin' Up! set called "Celebrate." The stamps from the set are the package, the ribbon on the package, and the bow on the package. I stamped them on a tag that was laying on my table. (It was cut with a Sizzix die a short time ago.) The sentiment is a little stamp I got from someone. I added the hand-doodling around the edge of the tag, and an eyelet in the hole. I mounted the tag on foam squares. The background was embossed with an old Cuttlebug folder and matted with cardstock to match the tag.

Thanks so much for stopping by, and I hope you'll come back and visit again soon!

Friday, April 22, 2016

Celebrate #1

I was actually thinking about skipping some of my Stampin' Up! sets, even though I have vowed to use them all. I still might do that, but for at least another day, I continue to use the ones in my current stack. I have two more after this one, and I'm not sure if you'll see them or not:)

Today's set is called "Celebrate." It consists of several stamps, and I will not use them all. The balloon, string, Celebrate, and confetti stamps are all from this set. I simply stamped and matted.

Thanks so much for stopping by, and I hope you'll come back and visit again soon!

Thursday, April 21, 2016

Birthday Boy

A quick and easy birthday card for today. I used a "watercolor" stamp from My Favorite Things for the background. I stamped it with four different colors of distress ink. Then I added the sentiment in black - also from My Favorite Things. I trimmed it down and matted with a coordinating cardstock.

Thanks so much for stopping by, and I hope you'll come back and visit again soon!

Wednesday, April 20, 2016

New Beginning

I'm taking a mini-break (maybe longer) from my Stampin' Up! project to bring you this card.

I used a My Favorite Things stamp for the "watercolored" background. I actually used two colors of distress markers, but you can't tell. After stamping the blue, I added the butterflies from Inkadinkado. I colored with Copics and added a few white dots to the wings. The bottom border was punched with an EK Success punch and the scored lines were done with my Martha Stewart scoring tool. I added some orange bling to both the stamped image and also the punched border. The words of encouragement are a MFT stamp, also.

Thanks so much for stopping by, and I hope you'll come back and visit again soon!

Tuesday, April 19, 2016

Confetti Cupcake #2

Not very exciting for sure, but here is today's card! It uses the rest of the stamps in the Stampin' Up! set called "Confetti Cupcake." The stamps consist of the cupcake bottom, the frosting, the "confetti" on the frosting, the candle, the flame and the sentiment. The cupcake frosting is embossed with clear powder. The frosting, candle and flame are all mounted on foam squares.  The flame is embossed with sparkly powder. I matted with purple. All of the stamps were stamped on scraps and cut out.

I promise I like tomorrow's card a lot better! :)

For a previous commenter - the Stampin' Up! stamps that I've been using in my quest to use them ALL are almost entirely retired. 

Thanks so much for stopping by, and I hope you'll come back and visit again soon!

Monday, April 18, 2016

Confetti Cupcake #1

The next Stampin' Up! set in my stack. This set is called "Confetti Cupcake." You'll find out why when I post another card made with it:)

I stamped the balloon with Versamark ink and embossed with light blue embossing powder. I cut out both pieces (the main balloon and the small part the string is tied around). Then I used a darker blue marker to color the bow around the balloon and stamped that part on the image panel. I added the embossed pieces, then added the string with another stamp. The sentiment is from the same set. I matted with darker blue cardstock and put it on the right side of the card front.

Thanks so much for stopping by, and I hope you'll come back and visit again soon!

Sunday, April 17, 2016

Botanical Garden #3

My third card using the Stampin' Up! set called "Botanical Garden." And it's even simpler than Friday's card! :)

While trying to figure out what I wanted to do with this stamp, I thought I would go with a light blue background. For some reason, I thought I had some light blue embossing powder (that I had never used) and I was right. So, I stamped the image with Versamark ink and embossed with the light blue powder. My plan was to color the flowers, but I liked it so much plain, that I just left it. I matted with matching blue cardstock. It's very rare for me to not put a sentiment on my cards, but this one seemed right without one.

Thanks so much for stopping by, and I hope you'll come back and visit again soon!

Saturday, April 16, 2016

Happy Anniversary, Lucy and David!

This card uses the last stamp (except for the words) from the Stampin' Up! set called "Baroque Motifs." The stamps from the set are the swirls in the background and the medallion.

I stamped the background with Versamark and used a new jar of embossing powder from Michael's called Glitz. It's the same as my old one called Iridescent Sparkle. I did the same with the medallion stamp, then I trimmed around the edges and mounted on foam tape. Since it sort of resembled a flower, I used a swirly die from Spellbinders to cut "leaves" from green textured cardstock. I matted with black and added sheer black ribbon. Actually, I added the ribbon and THEN I matted! :) I cut the tag with an old Sizzlits die from Sizzix. I stamped the sentiment using a stamp from Papertrey Ink. I inked up the whole tag with my Versamark and used the same Glitz embossing powder. Then I inked it again with Versamark a couple times and added some thick embossing powder. I've tried to capture the multi-colored effect of the embossing powder.

This card is for one of my oldest (well, not really the oldest! We've just been friends almost forever!) friends and her husband on their anniversary. Their anniversary was yesterday, but I wanted to give her time to open the card before seeing it here. Happy Anniversary, Lucy!

Thanks so much for stopping by, and I hope you'll come back and visit again soon!

Friday, April 15, 2016

Botanical Garden #2

My second card using the Stampin' Up! set called "Botanical Garden." I again stamped with Versafine black ink and embossed with black embossing powder. I used Memento markers to color the leaves. I matted with black cardstock and mounted on foam squares. The sentiment is from Kaisercraft.

Thanks so much for stopping by, and I hope you'll come back and visit again soon!

Thursday, April 14, 2016

Botanical Garden #1

Here is the first of three cards using the Stampin' Up! set called "Botanical Garden." Sorry the picture is so dark. I have included another picture of it, too, so you can kind of see the shimmer.  The cardbase is off-white and is 4 x 6 inches.

I stamped the image on black with Versafine Onyx Black ink and embossed it with black embossing powder. To color the image, I used three colors of PearlEx powder. I matted with a textured green cardstock. The sentiment is from Kaisercraft.

Thanks so much for stopping by, and I hope you'll come back and visit again soon!

Wednesday, April 13, 2016

Warm Tulip Wishes

I have a cheery "warm wishes" card to share with you today. These tulips have been sitting on my table for a while, waiting to be used. They are pretty much the last of the "loose" card parts. Everything else is sorted and in little sleeves. These were colored and ready to go.

I punched the green cardstock with a Martha Stewart border punch. I stamped the sentiment, from the same Stampin' Up! set as yesterday's card, and scored a few lines with my Scor-Pal. The tulips (stamp and die) are from Lawn Fawn. I glued down the stems and mounted the flowers on foam squares.

Thanks so much for stopping by, and I hope you'll come back and visit again soon!

Tuesday, April 12, 2016

Faux Embossing


This card uses a stamp set from my current stack of Stampin' Up! stamps to use. The set is called "Beautiful Borders." It consists of two border stamps and four small sentiment stamps. You will see the other border and another sentiment soon, as I have used them on a card to be posted at a later date.

In the pile of card parts I went through recently, there was just a small snippet of card stock on which I had used this technique. I had no intention of using the small piece, but it reminded me to use this fun technique. I'm not sure what its "official" title is, but I'll call it "Faux Embossing" as it truly looks embossed in real life. You need to feel it to realize it really is flat. After doing the stamping, I scored a line above and below the border with my Scor-Pal. I stamped the sentiment underneath.

So, here is how you do this. As I used a wood-mounted stamp, I used my Stamp-a-ma-jig. You could use your MISTI, too. You need matching cardstock and ink. I used SU Sage Shadow. I first stamped the image in Sage Shadow. I lined up my Stamp-a-ma-jig exactly over the image and then I shifted it slightly to the right. Then I stamped the image again using white ink. That's it!

Thanks so much for stopping by, and I hope you'll come back and visit again soon!

Monday, April 11, 2016

Happy Birthday, Dad!

Sunday is my dad's 91st birthday and this is the card I made for him. I didn't get a great picture of it, as the gold shimmery paper and the gold embossing don't look like a great match. Trust me - they look much closer in color in real life!

The main image is another stamp from the Stampin' Up! set called "Baroque Motifs." I stamped on black with Versamark ink and embossed with detail gold embossing powder. I cut it with a Nestability die and matted with a scalloped circle cut from shimmery gold paper. The sentiment, also embossed with gold embossing powder, is from My Favorite Things. I matted the black layer with gold, also, and used a kraft card base.

Thanks so much for stopping by, and I hope you'll come back and visit again soon!

Friday, April 8, 2016

Eagle on our Roof!

One of our neighbors called us last night and suggested we check out our roof. This is what we found! Amazing! A beautiful bald eagle perched right on a peak of our roof!! We got to watch him take flight, too.
I'm SO glad the neighbor let us know about it!

Thanks so much for stopping by, and I hope you'll come back and visit again soon!

Tuesday, April 5, 2016

Tulips

I needed a very simple thinking of you card, so this is it. The tulips are all one stamp from GIna K. The sentiment is also from Gina K. I used distress makers to color the images and sentiment. I matted the tulips with green and mounted on foam squares.
While I still had the tulip stamp out, I happened to notice this pre-die-cut piece of ivory. I thought I could just as well make another card, since I needed a thank you card, too. I used Memento markers for this card. I didn't clean the stamp first, and therefore the tulips are slightly different shades of purple. Pretty cool, I think:) Again, the tulips are mounted on foam squares, and the sentiment is from the same Gina K set. The card base is ivory to match the image panel.

Thanks so much for stopping by, and I hope you'll come back and visit again soon!

Sunday, April 3, 2016

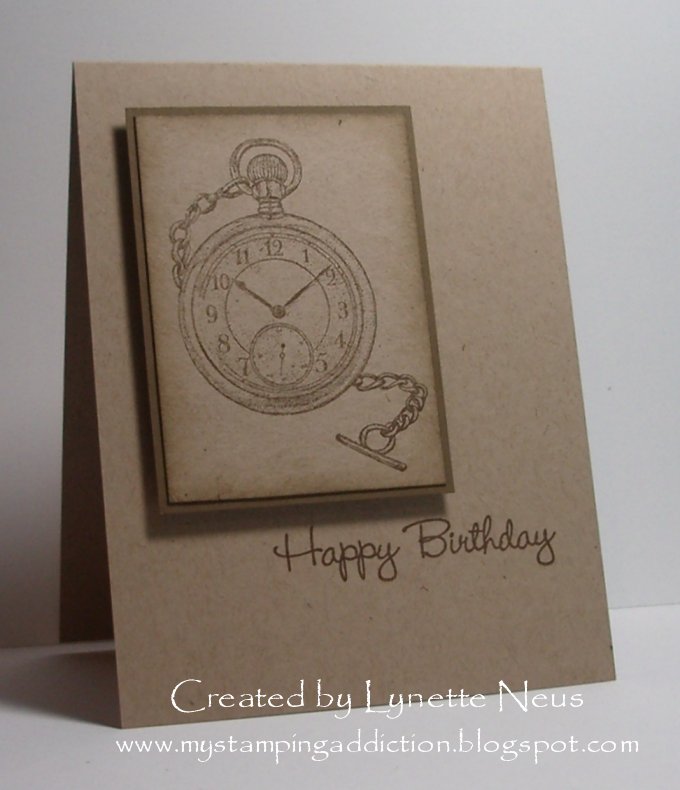
Happy Birthday, Jim!

I made this card quickly for my husband, Jim, yesterday. Nothing like leaving it to the last minute, as his birthday is today. :) Just a very simple card, but it will serve the purpose.

Both the pocket watch stamp and the sentiment are from My Favorites Things. The image panel is mounted on foam squares. The stamping was done in such a pretty shade of brown - Soft Suede from Stampin' Up! I sponged a little matching ink around the edges of the image and matted it with Soft Suede cardstock.

Thanks so much for stopping by, and I hope you'll come back and visit again soon!

Friday, April 1, 2016

April Calendar Page

Wow - April is here! Amazing how fast time is zipping by!!

The image on this page is from Stampin' Up! I colored it with Copics. I printed the sentiment on my computer. I added a bit of color around the edge of the sentiment with another Copic marker.

The Excel files I have created to print my calendar pages, along with cutting instructions, can be found by following the links on the page found under my blog title.

Thanks so much for stopping by, and I hope you'll come back and visit again soon!

Saturday, March 26, 2016

Sparkly Purple Birthday


 I actually found it hard to make a birthday card for our soon-to-be six-year-old granddaughter! I wasn't sure what she was "in to" these days. So, I went purple and sparkly. How could I go wrong?

I had actually already started this card, because I used a large stamp from my next Stampin' Up! set. The set is called "Baroque Motifs." I used Versamark to stamp the background stamp multiple times (well, one full stamp, and then several partials.) I used my Iridescent Sparkle embossing powder. That is the one jar of embossing powder that is almost empty! I didn't realize I had used it so much. Then I didn't know what to do, and I let it sit for a while. I ended up cutting a tag with a fancy tag Spellbinders die. I then stamped the sentiment (from The Paper Studio) and the little flowers/designs and used the same embossing powder. I added a couple layers of cardstock underneath to give it more substance, and then mounted on foam squares. I hope she likes it!

Thanks so much for stopping by, and I hope you'll come back and visit again soon!

Friday, March 25, 2016

Color Swap Birthday

I made this card for the Color Swap with my stamping group. The colors are "purple, white and one other color." My "other color" is green. (Oops, I just realized that I added slight blue and gray shading! I guess I forgot that part when I was coloring.)

I cut the doily using a Darice die. It's new (to me) and I'm disappointed that I didn't check the size before ordering it. It's too big to fit on a standard card. I was also thinking that it had more cut out of it, but most of it is embossed. I still like it well enough, though. So, I cut it, embossed it, and trimmed it down to fit on the card. The image is from an Inkadinkado set and it's colored with Copics. The sentiment is from Papertrey Ink and I embossed it with Detail White embossing powder.

Thanks so much for stopping by, and I hope you'll come back and visit again soon!

Thursday, March 24, 2016

Simply Patterned Paper Birthday

A simple, but I think very pretty, birthday card for today's post. It was nice to have a little time in my stamping room yesterday.

Again I say - I could never use up my patterned paper in a million years! (That might be a slight exaggeration, but maybe not, since I would probably buy more along the way. LOL!) At any rate I actually used up another piece. I love this flowered print. I simply cut a piece to nearly cover the card front and matted it with a beautiful brown cardstock. I'm thinking a lot of people don't like brown, but I happen to like it a lot. I used a scrap from cutting that piece for the sentiment panel. I stamped the greeting with a stamp from Impression Obsession, matted it with the same brown, and popped it up on foam squares. Done! Hopefully I'll have another card before too much more time passes.

Thanks so much for stopping by, and I hope you'll come back and visit again soon!

Sunday, March 20, 2016

"Cracked" Image Birthday

An "oldie-but-goodie" technique for today's card. I'm not sure what made me think of it, but here it is. I stamped the image (from Inkadinkado) and colored it with markers. Then I inked up the entire panel with Versamark and covered it with Iridescent Sparkle embossing powder and heated it. Then I stamped again with Versamark and covered it with Deep Impressions embossing powder. (Different brands have different names.) I added two or three more coats of the thick embossing powder. It was perfect - just the way I wanted it. But, then when I came back to it a while later, I somehow managed to crack it:( However, there is a technique called "cracked glass," so that is what this turned into. I just added lots more cracks and then sponged with distress ink. I matted with green cardstock and mounted on foam squares. I used the same green cardstock for the bottom layer. The sentiment is from Kaisercraft. I cut it out with a new-to-me Darice die and embossed with an old Cuttlebug embossing folder. The cardbase is ivory.
A closer look at the image panel. You can see the sparkle a little better in this picture.

Thanks so much for stopping by, and I hope you'll come back and visit again soon!

Saturday, March 19, 2016

Easter Cards

A year ago when I was in Omaha stamping with friends, I stamped and cut out these images and sentiments. I came across them about a month ago and decided I better get them made into cards soon. Some of the images were colored and some weren't done yet. I'm sharing both of them only because one basket has smiley faces on the eggs and one doesn't:) The inside has more stamped, colored and die-cut images, but I didn't take a picture of them. The images and dies are from Lawn Fawn.

Edited to add: The background was embossed with a Darice "Basket Weave" folder. Thanks to Sheri for the use of her stamps and dies! The sentiment is mounted on foam squares. I guess I was in a hurry when I wrote this post last night!

Thanks so much for stopping by, and I hope you'll come back and visit again soon!

Monday, March 14, 2016

All Occasions #4

The last card using the Stampin' Up! set called "All Occasions." (And the last set in that stack. On to another stack!)

Again, colored with Copics. I matted with red and mounted on foam squares. Added the sentiment. Both the image and sentiment are from the set. I added them to a white panel and glued to the card front.

Thanks so much for stopping by, and I hope you'll come back and visit again soon!

Sunday, March 13, 2016

All Occasions #2 and #3

Here are cards #2 and 3 using the Stampin' Up! set called "All Occasions." I have two stamps left to use.

This first one uses the flowers and the sentiment "Thanks to you." I embossed a piece of cardstock slightly smaller than the card front using a Cuttlebug folder. I stamped the image using my Stamp-a-ma-jig and colored it with Copics. I added the sentiment under the image and added the panel to the card front.
Same card - different image and sentiment. This sentiment is from Papertrey Ink.

Thanks so much for stopping by, and I hope you'll come back and visit again soon!


Friday, March 11, 2016

All Occasions #1

This card uses the next set in my quest to use all of my old Stampin' Up! stamps. It's called "All Occasions." I am about half done with that task. (I started over a year and a half ago! It's a slow process. :) )

Today's card uses three stamps from the set - the frame, the image and the sentiment. There are three more images and two more sentiments. I colored the image with Copics, matted the image panel and mounted on foam squares. The background was embossed with an old Cuttlebug folder. Hopefully it won't be TOO long before I will get the other stamps used.

This is in response to Belinda who commented on this post. The embossing folder that I used is from the set of "Small Flowers" embossing folders from Cuttlebug.

Thanks so much for stopping by, and I hope you'll come back and visit again soon!

Sunday, March 6, 2016

Watercolor Sympathy

Not the most creative card I've made, but I still like it. I dug out this Inkadinkado set and remembered how much I love the images. 

I used watercolor paper for the image panel. I used a brush and water and ink to color the leaves. They look a little more "watercolored" in real life than they do in the picture. The sentiment is from Papertrey Ink. I matted with black and added to an ivory card base.

Thanks so much for stopping by, and I hope you'll come back and visit again soon!

Saturday, March 5, 2016

Wonderful Words Thank You

One more card using the Stampin' Up! set called "Wonderful Words." This makes three of the four stamps that I have used. The fourth says "friendship" but I just don't think I would use that card, so I don't plan on using it.

I tried something different on this card, but an artist I am not! I used a piece of watercolor paper and wet it thoroughly. I smooshed three colors (an ivory, a blue and a purple) of distress ink onto my craft mat and used a brush to add them to the watercolor paper. It's not the best background, but it's acceptable. The flower stamp is from an Inkadinkado set. I colored it with Copic markers. I matted the image panel with black and added it to an ivory card base. This completes my use of the two smallest sizes of Stampin' Up! sets - on to the next size!

Edited to add: Sandy - I am just about half done with my project. It's been a long one so far! I really am committed to finish it, though, no matter how long it takes. :)

Thanks so much for stopping by, and I hope you'll come back and visit again soon!

Thursday, March 3, 2016

Vivid Greetings #5 and #6

OK. I decided I needed to use the last two little stamps of the Stampin' Up! Vivid Greetings set. I wasn't sure I would, but a tiny bit of inspiration came to me, so here they are. The little candle and the little heart are the ones from the set. Another set done! :)

I was thinking these stamps would make nice teeny tiny cards, but who makes teeny tiny cards??? But, that made me think of my teeny tiny envelope punch. Well, the punch is big, but the envelope is teeny tiny! The punch is from Marvy. So I punched out the envelope from yellow cardstock, folded it up and glued it together. I inked up the candle stamp with markers and stamped it on a small piece of cardstock which really IS a card, as it's folded in half. I cut a piece of white cardstock, matted it with the same yellow, mounted it on foam squares and added it to a card base. I glued the envelope to it, but the little "card" is simply inserted a little bit. I may decided to glue it in later. I also added Star Dust Stickles to the flame. 
This card was done the same way, except I forgot to mount the panel on foam squares. I added Star Dust Stickles to the heart. The little greeting stamps are from a set from Papertrey Ink. I love the sentiments and the fonts, but they are SO SO tiny that they have rarely been used by me. (I think they later came out with the same set, but bigger stamps.)

Edited to add: Bea - this set from Inkadinkado is called "Beauty Stems." Here is a link to Amazon so that you can see what it looks like. I think it's a beautiful set!

Thanks so much for stopping by, and I hope you'll come back and visit again soon!

Wednesday, March 2, 2016

Retirement Flowers

A friend of ours is retiring on Friday after 39 years at the same job. Good for her!!! We wish her the best, for sure!

This is the card I made for her. The flowers stamp is from Inkadinkado. I stamped it on watercolor paper and used die inks and an aquapainter. The sentiment is from Repeat Impressions. I added a bit of embossing on the bottom (Darice embossing folder) and then scored a line above it with my ScorPal.

I'm linking this up to the CropStop challenge - Anything Goes. They carry Darice embossing folders, although I don't see this one on the site.

Edited to add: Bea - this set from Inkadinkado is called "Beauty Stems." Here is a link to Amazon so that you can see what it looks like. I think it's a beautiful set!

Thanks so much for stopping by, and I hope you'll come back and visit again soon!

Tuesday, March 1, 2016

March Calendar Page

Oh my - it's March already! Here is my calendar page.

I used a Tsukineko multi-color pad to brayer the color on the background. The little girl and the sentiment are from a Stampin' Up! set that I borrowed from a friend. I didn't write it down in my notes, but I bet the butterfly is from Inkadinkado. I added a bit of color on the eggs in the basket.

Thanks so much for stopping by, and I hope you'll come back and visit again soon!